Bootstrap Checkbox Switch
Overview
In some cases the easiest details might probably become quite critical-- most especially when you come to need them. For instance exactly how do your visitors communicate with the webpages you set up claiming a simple Boolean act-- just yes or no concerning a couple of the issues you should ask, just how they do consent to the conditions and terms or maybe line up a few of the achievable options they might possess. We in most cases surpass this with no paying enough of an care to the element chargeable for these types of activities however the Bootstrap Checkbox State is actually a quite critical feature-- one our forms can not actually complete without.
Located in the most recent fourth version of the Bootstrap platform we are delivered with the
.form-check.form-check-label<div>.form-check.form-check-label<label><input>.form-check-inputEffective ways to apply the Bootstrap checkbox:
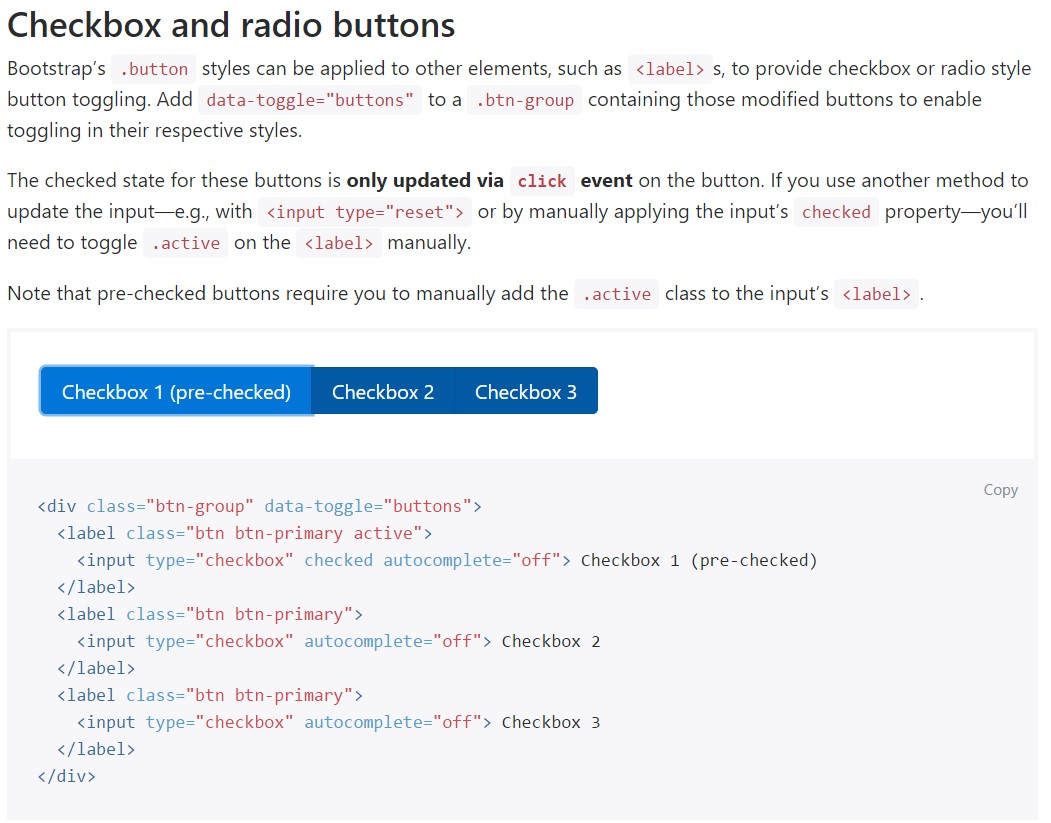
Bootstrap's
.button<label>data-toggle=" buttons".btn-group
<div class="btn-group" data-toggle="buttons">
  <label class="btn btn-primary active">
    <input type="checkbox" checked autocomplete="off"> Checkbox 1 (pre-checked)
  </label>
  <label class="btn btn-primary">
    <input type="checkbox" autocomplete="off"> Checkbox 2
  </label>
  <label class="btn btn-primary">
    <input type="checkbox" autocomplete="off"> Checkbox 3
  </label>
</div>
From time to time we need the checkboxes to arrive in our forms without the customer truly having the opportunity to take any practice clicking them-- that is definitely where the disabled option comes out.
Just to disable properly a checkbox in Bootstrap 4 applying the common HTML attribute
disabledIn the event that you like the tip and indeed really want to accomplish this you must assign the
.disabled.form-checkOne other example
Anytime you are working with checkboxes, wrap them in a
<label>.custom-control.custom-checkboxWork with
.custom-control-input<input>Additionally use two
<span>.custom-control-indicator.custom-control-description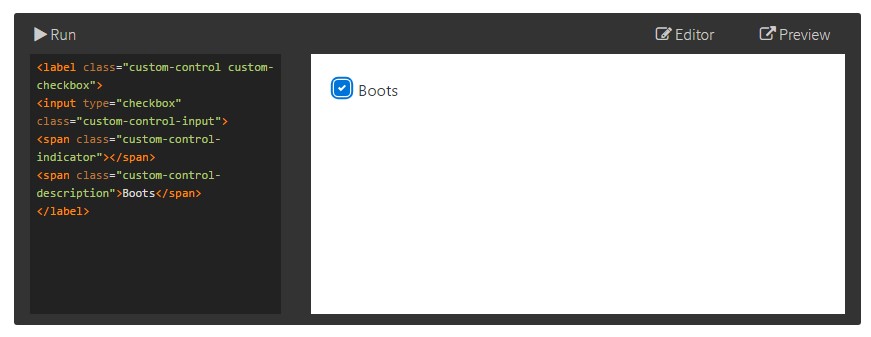
<label class="custom-control custom-checkbox">
<input type="checkbox" class="custom-control-input">
<span class="custom-control-indicator"></span>
<span class="custom-control-description">Boots</span>
</label>
Bootstrap Checkbox Form forms
Default radios and checkboxes are raised upon with the help of
.form-checkDisabled checkboxes and radios are assisted, however, to supply a
not-allowed<label>.disabled.form-checkA fresh component for the Bootstrap version 4 system is the creation of the so called custom form components. These are actually the identical components we are knowing within capability although styled even more interesting and with the Bootstrap means. By using them you can add fascinating spice as well as personality to your information via just assigning a handful of extra classes to the controls you feature in your forms.
For you to employ custom-made checkboxes wrap them inside a
<label>.custom-control.custom-checkbox<input>.custom-control-input<span>.custom-control-indicator.custom-control-descriptionFinal thoughts
That's mostly everything you should do in order to bring in a checkbox feature inside of your Bootstrap 4 powered websites and bring in a number of customized flavor to it adding in it a tasteful looks. Currently everything you need to do is repeat the practice unless you've reviewed every one of the checkboxes needed are already on the webpage.
Take a look at several online video information relating to Bootstrap checkbox
Connected topics:
Bootstrap checkbox approved documentation
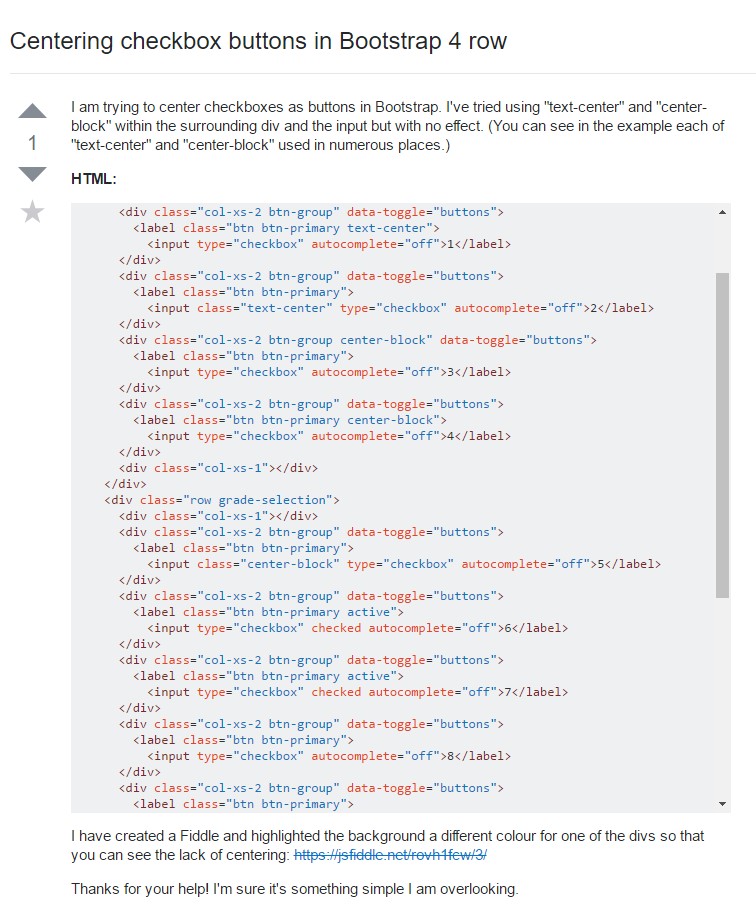
Centering checkbox buttons in Bootstrap 4 row
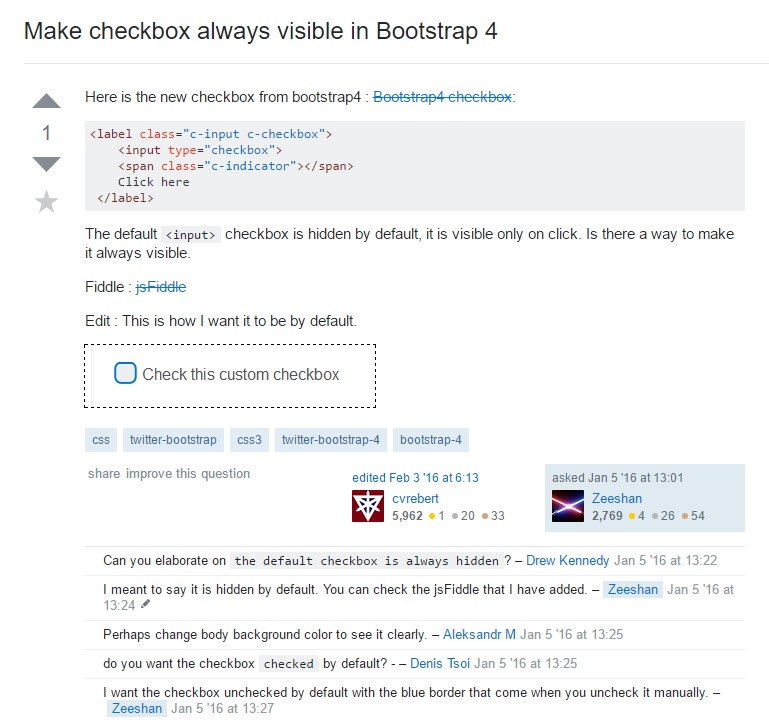
Make checkbox always visible in Bootstrap 4